Here's a stream of pics from inside the Big Z Creations Mini-Shop. I have a 120sq. ft. of work space and it's a pretty comfortable workspace - well... for now at least. In the summer, I find it best to work at night and or early in the morning. Whatever I can fit into my schedule. The summer heat is now bearable with the installed vents and shop fans. I'm working to improve the electrical conditions and lighting as well as int. insulation, finishing board, ext. painting, primer and shelving / tool organization bays.
 As you can see, I share the space with a few other storage items. I have yet to shuffle them around to maximize floor space. The bikes will be moved into a spare bedroom in the house which will free up a lot of space in itself. I have a few light duty plastic saw horses that are practically worthless, I'm thinking I should dump them on the curb as I have two real saw horses outside my shop currently. I have a few plastic rubber made bins of tools and etc. that need to be put up to free up floor space. I'll later use the plastic bins for wood scraps and cut off material to be reused for future projects such as my tool board.


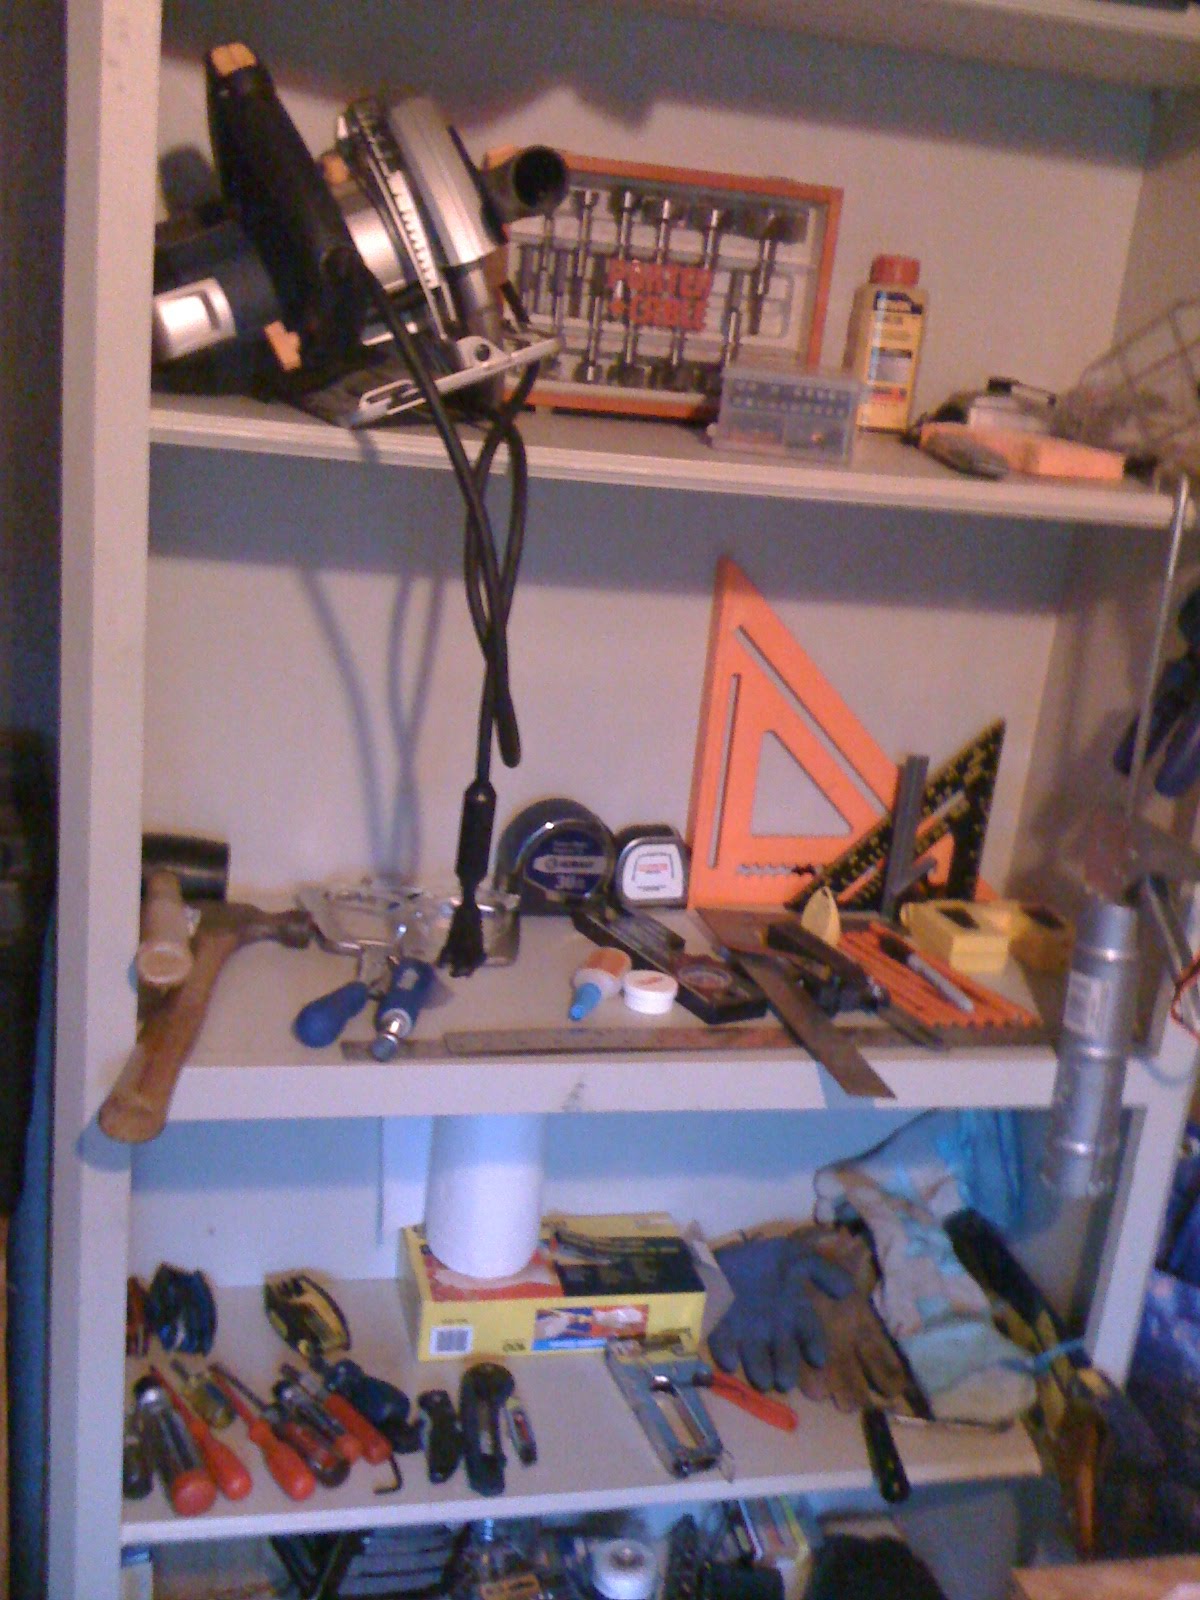 Above are a few shots of my tool shelf - a former bookcase made of sturdy wood. Once I have constructed my tool organization board these hand tools and etc. will be hung above my tool bench for easy access, use and return. A hanging tool board will not only organize my shop but also maximize efficiency.


I have a few pics detailing the work bench that I've constructed, I have left the open space in the workbench exposed in order to someday fill that void with a built - in removable router table work station. I'll later integrate that into the design of my work bench. I have a pre-design in my head to make a cabinet space below the router in order to conveniently catch saw dust. This will also be the same for the table saw cabinet I'll construct.


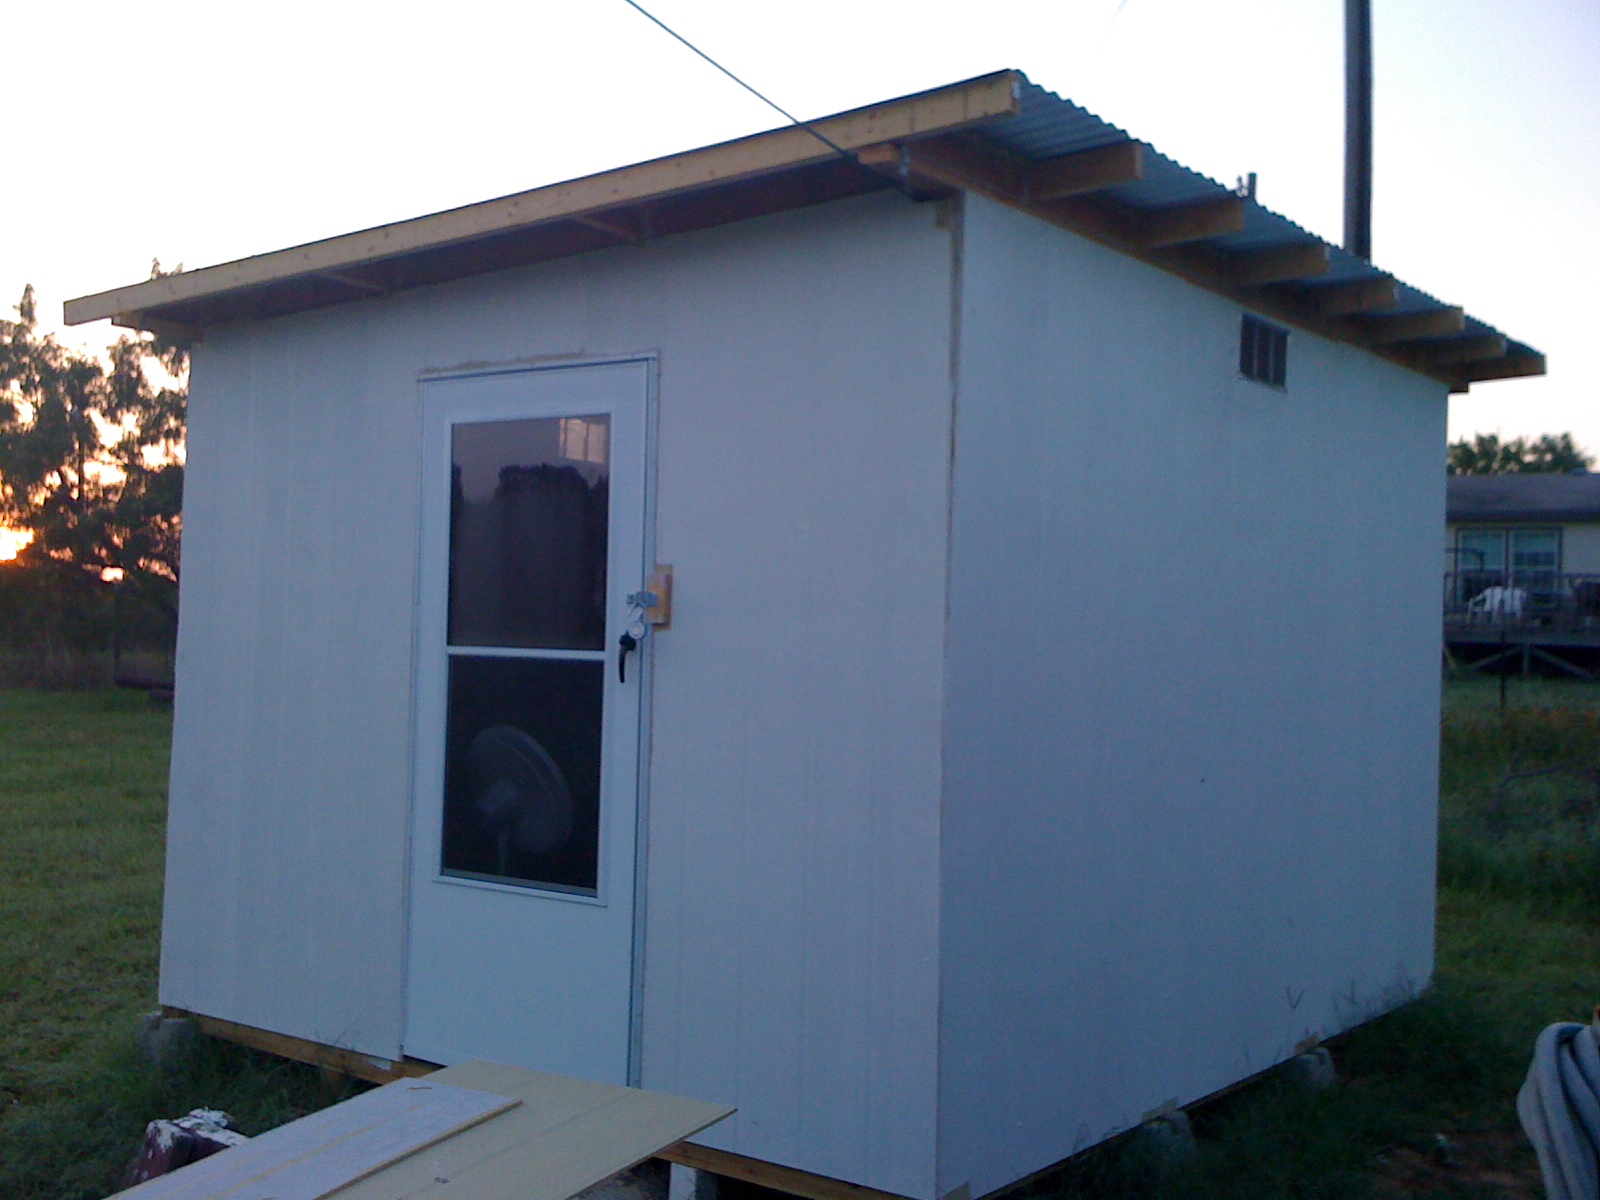
Here are photos of a primered workshop. I still have the roof supports to primer. I'll be putting up the 1x4 trim board after they are purchased, I've been dragging my feet to buy them. You can see my louvered vents on either side - they have been doing a very, very good job keeping the shop cool.
Leave a Comment! :)
Oh heck yeah! The vents are a life-saver, I bet!
ReplyDeleteMy dad used to have this awesome workbench (he's a woodworker such as yourself) that was basically a frame that smaller boards dropped down into. The boards weren't fastened in place so as to make it easier to remove a couple should you need the opening for clamping and/or ease of access to the piece you are working on. I'm sure there is a name for this workbench, but as I am not a woodworker, I do not know the name... He used it a lot to refinish furniture.
This was my inspiration for making my welding table only half-topped. Just leaving the skeleton frame makes for easy-to-clamp space. :)